

Trello is a web application for both computers and phones that allows you to create lists of tasks, group them and manage them on an ongoing basis. Team collaboration and the assignment of tasks to individual team members is also possible.
Grouping and prioritising responsibilities, managing team work
- create whiteboards and thus organise what you are working on
- use boards on your own and with friends, family or a team
- customise boards for different work processes and projects
- add lists of tasks on the boards
- assign tasks to yourself and colleagues
- write comments together with friends or your team
- attach files from Google Drive and Dropbox
- upload photos and videos.
Getting started and using Trello
The Trello app consists of four basic elements that offer different functionalities:
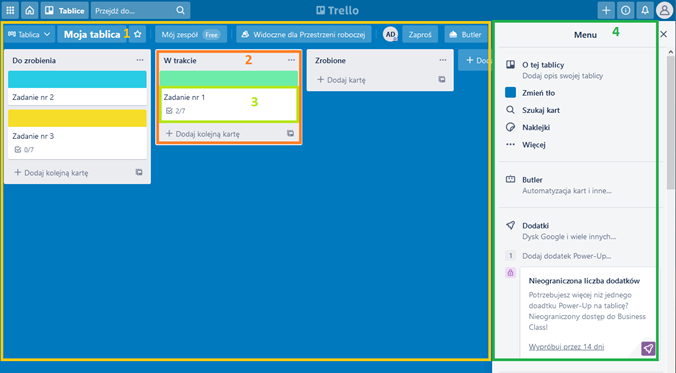
Image 1. The home page with a view of the board, the following functional elements of the Trello app are marked with numbers: 1 in yellow - Board, 2 in orange - List, 3 in light green – and Card, 4 in dark green - Menu.
1. Board is the main site bringing together all the task and aspects of a given project, event or problem.
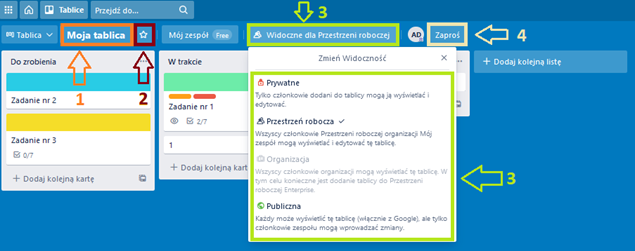
Image 2. A view of the Trello Board, the arrows indicate the elements: 1 marked in orange - My Board, 2 in maroon - Favourites, 3 in light green - Visible to, and 4 in beige - Invite, which allow you to edit the settings of a given Board.
The basic way to arrange the Board is to divide the Cards into tasks: ‘to-do’, in progress’ and ‘done’, but the names of the Cards can be changed at will and many more can be added, so there is nothing to prevent you from using your Board for a different, more personalised purpose.
Lists can also be freely moved by changing their order relative to one another, and the order and priority of the Cards in a List can also be changed.
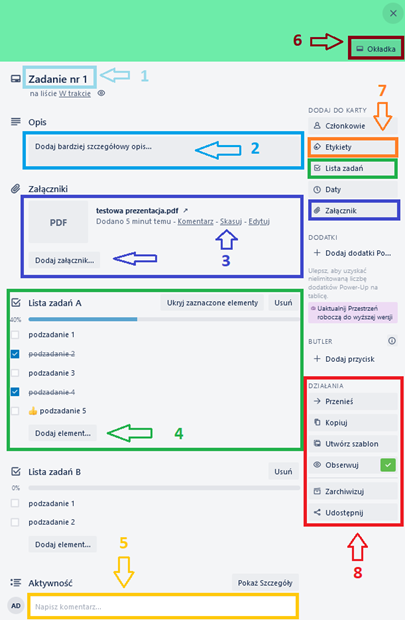
- Card description (2);
- Edit an added attachment or add a new file (3). If this field does not appear and there is no attachment here, the first new file can be added in the menu on the right;
- Create and manage the Task Lists belonging to the Card. Completed subtasks included in this Task List can be marked as completed, allowing the progress of the work to be monitored. There can be more than one Task List per Card;
- Add a comment (5);
- Change the colour of the cover of your Card according to your own preferences (6).
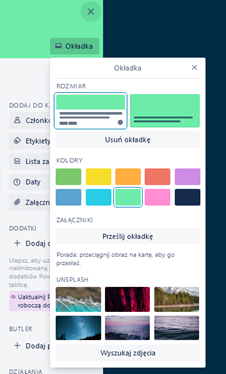
Image 6. A view of changing the Card cover.
Add a colour label to group our Cards at a glance or to give them a hierarchy (7).
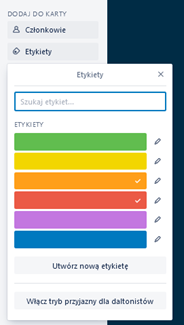
Image 7. A view of giving labels to a selected Card.
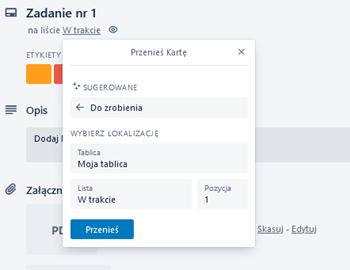
Using the side menu, you can move, copy, archive and share your Card (8).
4. Menu - When you are in the view of your Board, the Menu used to manage the Board is to be found on the right-hand side. Here you can, for instance, edit the general settings of the Board, change the colour of its background, add a description to characterise your Board, as well as filter your Cards and monitor all activities thanks to the Activity tab.
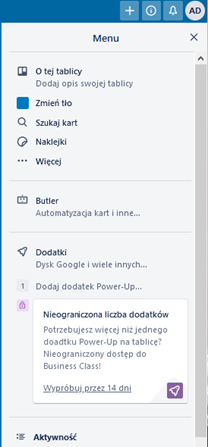
Image 8. A view of the side menu located in the main view of Board.
Keyboard shortcuts
- Board view::
- Navigation arrows - move between different elements of your board, e.g. between cards
- ENTER to open a card
- < and > - move the selected card
- E - quickly edit the selected card
- ESC - cancel or close the card
- SHIFT + N - add new card
- / - search.
- CTRL C, CTRL V - copy, paste.
- F - filter cards
- View of an open card:
- L – label setting.
- Numbers - assign selected colour label:
- 1 – green
- 2 – yellow
- 3 – orange
- 4 – red
- 5 – violet
- 6 – dark blue
- 7 – light blue
- 8 – light green
- 9 – pink
- 0 – grey
- D – set an end date with a reminder
- SPACE - assign yourself to a given card
- ESC - exit the card edition.
- C - archive the card
- CTRL + ENTER – save the information entered - when writing and editing the description fields.